Blog How detailed should wireframes be? A guide to wireframe fidelity
Wireframes are a powerful tool in your design’s early stages. But how much detail should you be adding to them?
Wireframes can serve many purposes. In a nutshell though, they’re a way of sharing design ideas earlier.
These quick and dirty layouts help us to communicate ideas sooner in the design process. They encourage a faster cycle of feedback and iteration. This makes them an incredibly powerful deliverable.
If you’re a UX designer, you’re probably creating wireframes all the time. For me personally, there aren’t many days where I won’t do some kind of wireframing work. In spite of this, it’s sometimes hard to know what your wireframes should look like.
Understanding wireframe fidelity
Even without the inclusion of polished look-and-feel, there’s still a lot of detail we could add.
For example, should we include…
- Real content and images?
- Grid systems?
- Realistic typefaces, sizes and weights?
These decisions affect what we call a wireframe’s ‘fidelity’.
Fidelity is the measure of how much visual detail we are adding. The greater the fidelity, the closer our wireframes get to the real deal.
When it comes to choosing the right level of fidelity in your wireframes, there’s no right or wrong answer. Like everything else in our kooky industry : it depends.
What level of fidelity should I use?
The answer depends on the why you’re making them in the first place.
Start with the following questions :
- Who are you sharing these wireframes with?
- What kind of feedback are you trying to get?
- What stage of the project are you at?
- Have any design fundamentals been agreed upon? (For example, you could be working within an existing corporate style guide).
In this guide I’m going to describe three main wireframe fidelities – low, medium and high. I’ll talk to the pros and cons of each, and when they should be used on a project.
Low fidelity wireframes
Examples of low fidelity wireframes
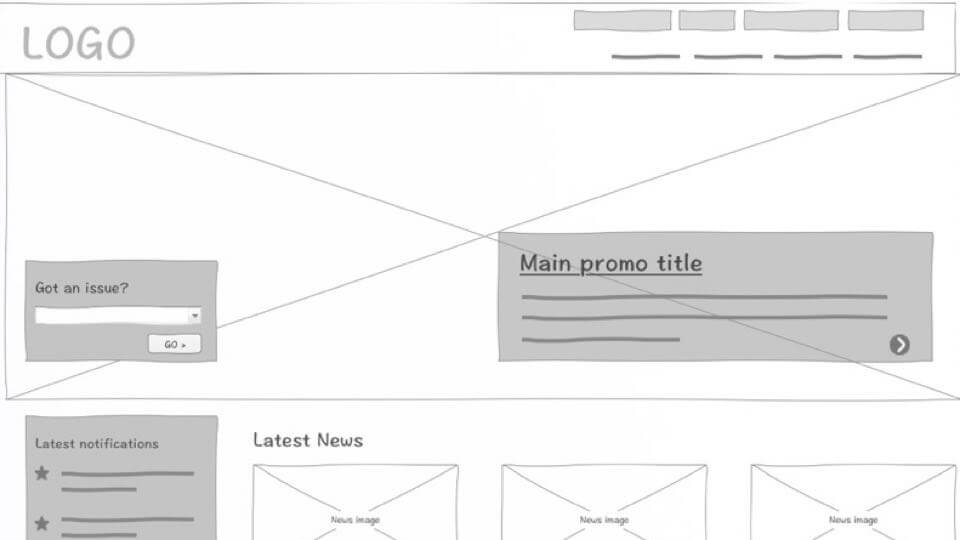
What do they typically contain?
- Very rough layouts of screens.
- Little to no detail to the specifics of content or layout.
- We may divide the screen into a series zones or blocks, rather than going into detail.
- No sense of scale, grid or pixel-accuracy.
How long should they take?
A single screen should take no longer than a few minutes to throw together. Think scribbling on the back of a napkin.
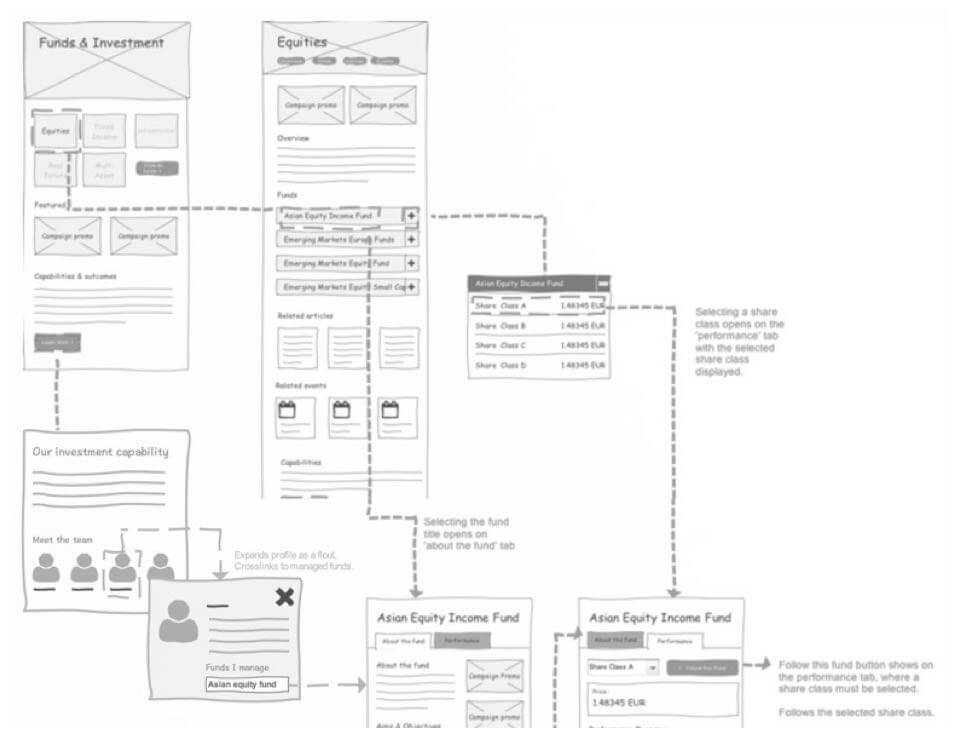
Quite often I’ll sketch several low fidelity wireframes on the same whiteboard or sheet of paper. I’ll then draw arrows that link these screens together, showing the flow between them.
This kind of drawing is called a ‘wireflow’. It’s a half-way house between a wireframe and a traditional process diagram. A sequence of low fidelity wireframes can be a great way to explain an early idea.
When to use them?
- Mid-meeting or in a workshop. To quickly throw something together whilst you’ve got people in the room.
- When you’ve got several potential concepts, and want to quickly share all of them.
- During the information architecture phase, where user flows are more important than the specifics.
- When you want to provoke brutally honest feedback. People feel better about critiquing deliverables that look more like rough workings.
When not to use them?
- When sharing with people who aren’t digitally savvy. Sometimes clients or users can’t look past the rough and ready appearance of low fidelity.
- When presenting formally, rather than co-creating. You might invite some criticism for having an unpolished deliverable.
Medium fidelity wireframes
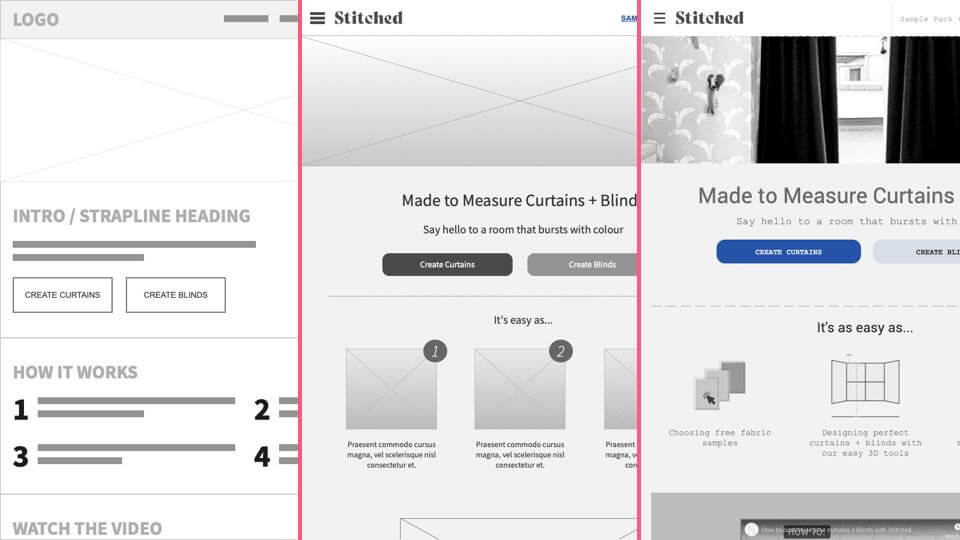
Examples of medium fidelity wireframes
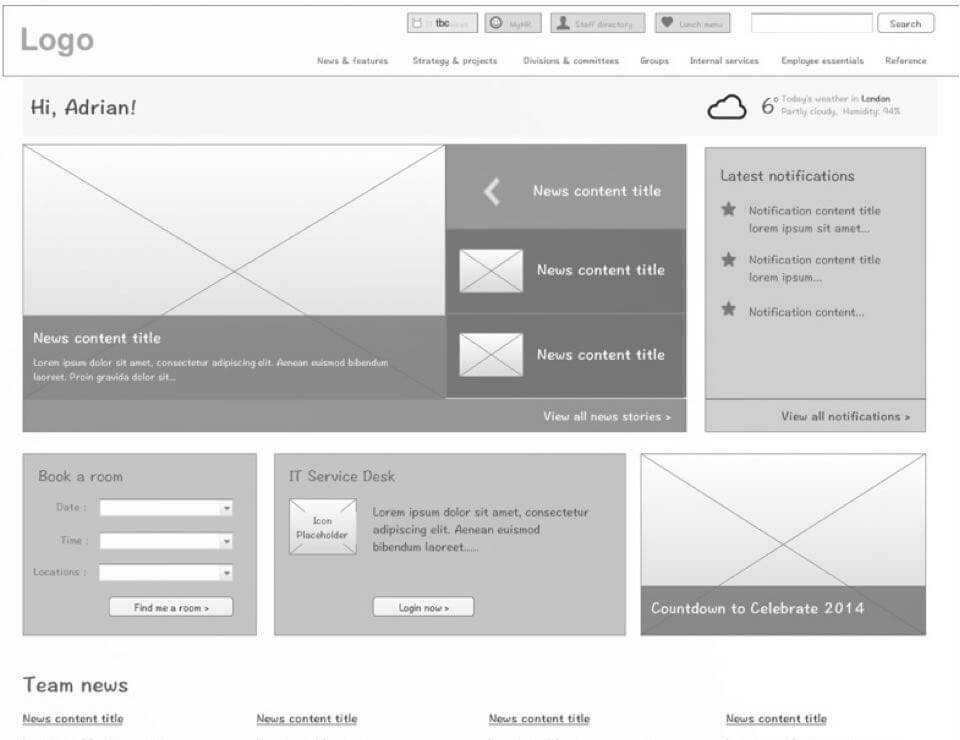
What do they contain?
- More accurate depictions of the layout.
- Detail is given to specific components, differentiating things like buttons from text only links.
- Varying text weights might be used to separate headings and body content.
- Though still black and white, they can use different shades of grey. This can be used to communicate the visual prominence of certain elements.
- Avoids final images or font styles.
How long should they take?
This is probably the most common type of wireframe you’ll produce.
A little more thought needs to be given to specifics, such as layout and components. That said, you should be able to create something shareable in a matter of hours. Whilst I use low fidelity wireframes when co-creating, I’ll work to medium fidelity in my first official deliverable.
When to use them?
- When the team has already agreed to the purpose of a screen, and we need to discuss specifics like layout and content.
- When you want to develop and present an idea before getting too bogged down in the fine details.
When not to use them?
- When you’re still trying to agree the actual purpose and goals of the screen. In the really early stages of a project, you should go for low fidelity instead.
- When your team doesn’t respond to anything that isn’t flashy, or just struggle to get their heads around wireframes. Those with a low technology level may benefit from high fidelity instead.
High fidelity wireframes
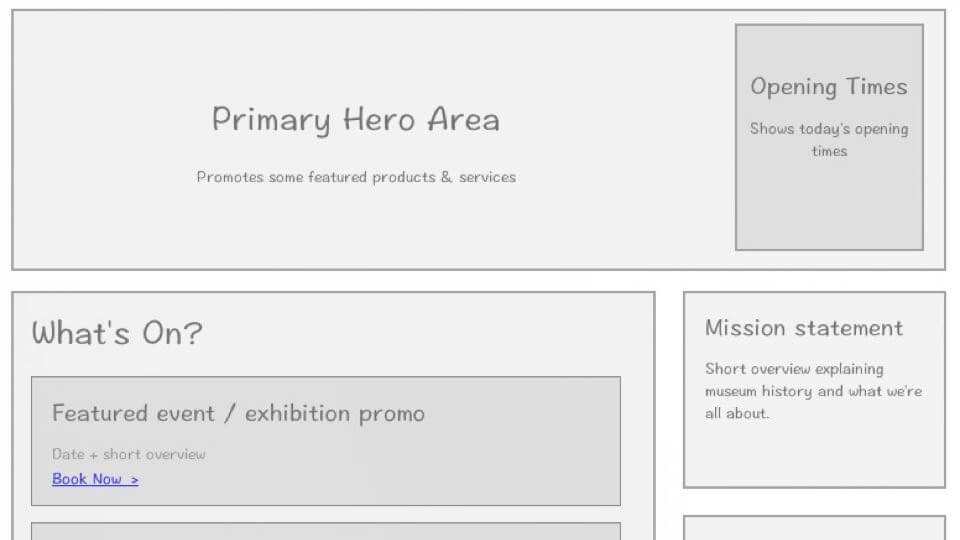
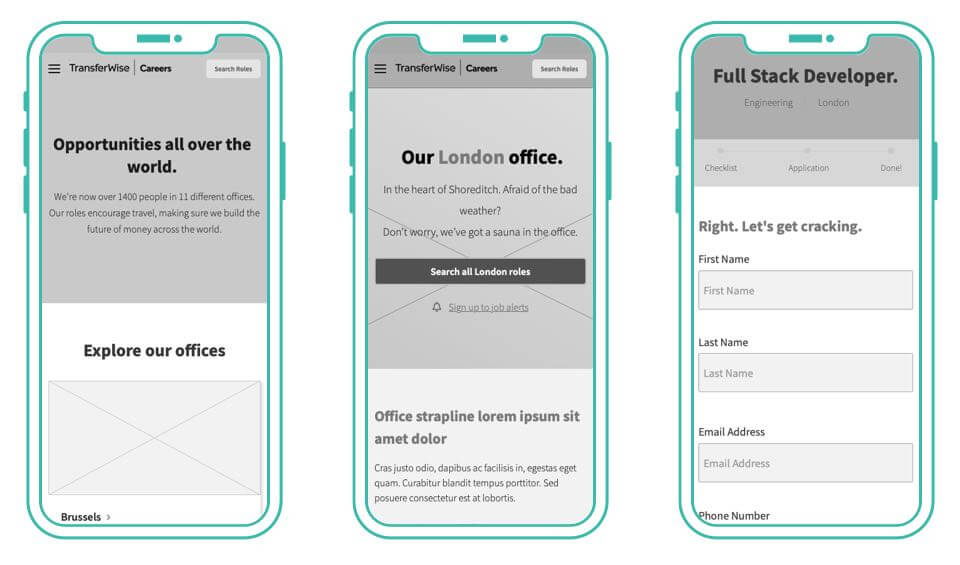
Examples of high fidelity wireframes


What do they contain?
- Pixel-specific layouts. Often uses a grid system.
- Real images, typography styles and colour if appropriate.
- Little or no placeholder text.
- Responsive behaviour and fluid widths (if prototyping).
How long should they take?
Make no mistake, adding these finer details to a wireframe is time consuming. A high fidelity wireframe is one step away from a polished visual design. Sometimes it can be hard to tell the difference!
A set of high fidelity wireframes can take several hours, sometimes even days to create. This is due to the level of precision required. Unlike low or medium fidelity, you will need to sweat the little details here.
When to use them?
High fidelity wireframes should always be saved until the later parts of the UX process.
It’s when you start really bringing the design to life in a way that closely resembles the final product. Your team won’t need much imagination to picture how the end result will look.
With high fidelity wireframes you’re investing a lot of time into the deliverable. It’s more about refining and iterating a single ‘safe’ concept, instead of experimentation.
Never skip straight into high fidelity. The energy required to create them will make you less inclined to try new ideas. Ideally the screen(s) should have gone through multiple versions already, in low or medium fidelity states.
When not to use them?
In the early stages of an idea, when experimentation should take priority over aesthetics.
When speed is of the essence.
A high fidelity wireframe is one step away from a polished visual design. Sometimes it can be hard to tell the difference!
‘Wireframing’ vs ‘Prototyping’
A quick heads up around the use of language.
I’ve seen a lot of designers use the terms ‘wireframe’ and ‘prototype’ interchangeably. It’s important to understand that these are actually very different concepts.
Wireframe: An early version of a design. It forgoes the polished look-and-feel, and instead focuses on function and usability.
Prototype: A design deliverable that is interactive. A prototype can be constructed using either wireframes or more polished designs.
When prototyping with wireframes you use any of the wireframe fidelities discussed in this guide. I’d always encourage prototyping, as it helps to add clarity to your ideas. After all, why tell when you can show?
Whether you prototype or not, make sure you’re using these terms appropriately. It will avoid confusing your project team.
The right level of detail for the right project
I hope this has given you a better understanding of wireframe fidelity, and the different approaches you can take.
When it comes to the detail in your wireframes, there’s no correct answer. It’s all about picking the right approach for the scenario.
Think of each wireframe fidelity level as a tool in your designer’s utility belt. I promise you’ll use them all at some stage or another!

Chris Myhill
— Director of Experience